
Call Us 📞 800-323-3130
Mon–Fri 8am–6pm CST, Sat–Sun 9am–1pm CST
Free design consultations
Showrooms in Miami & Fort Lauderdale
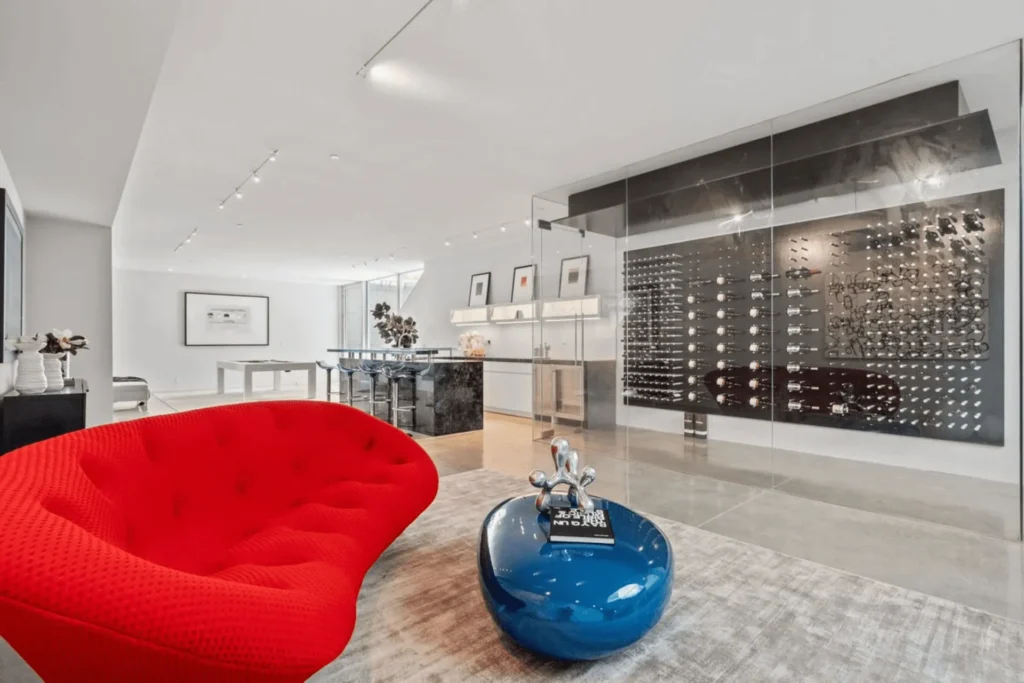
A custom wine cellar is more than a place to store bottles—it’s a carefully engineered environment designed to preserve your collection for years while enhancing the beauty and value of your home. Whether you’re converting a basement, under-stair space, spare room, or creating a stunning glass wine display, understanding the construction process helps you make informed decisions and avoid costly mistakes.
In this guide, we’ll walk through the seven essential steps that transform an empty room into a professionally built wine cellar.
Every successful wine cellar begins with selecting the right location.
A professional assessment considers more than just available square footage. Factors such as room dimensions, ceiling height, surrounding walls, sunlight exposure, and nearby mechanical equipment all influence the final design.
Common locations include:
During this stage, your designer will also determine the approximate bottle capacity and discuss your storage goals.
Planning ahead prevents expensive modifications later.
Once the space is selected, it’s time to create a custom layout.
This step balances aesthetics with functionality by determining how every bottle will be stored and displayed.
A professional design may include:
Modern 3D renderings allow homeowners to visualize the finished cellar before construction begins.
A thoughtful design also ensures easy bottle access while maximizing storage capacity. Get a Free Custom Wine Cellar Design today from our wine cellar designers.
The wine cellar’s structure is one of the most overlooked yet most important parts of the project.
Before installing racks or cooling equipment, the room must be properly insulated and sealed.
This stage typically includes:
Without proper insulation, outside heat and humidity constantly enter the cellar, forcing the cooling system to work harder and reducing its efficiency.
A well-built cellar envelope protects both the wine and the cooling equipment.
Temperature and humidity control are essential for preserving wine.
Unlike residential air conditioners, wine cellar cooling systems are engineered to maintain stable conditions—typically around 55°F (13°C) with 60–70% relative humidity.
The best wine cooling solution depends on several factors:
Common cooling options include:
Proper sizing is critical. A system that’s too small may struggle to cool the room, while an oversized unit may short-cycle and create unstable conditions.
With climate control in place, the cellar begins to take shape.
Wine racking is installed according to the approved design, combining storage efficiency with visual appeal.
Popular options include:
Ideal for traditional and transitional wine cellars, wood racks are available in species such as:
Wood creates warmth and timeless elegance.
Modern metal systems provide a clean, contemporary appearance while maximizing bottle visibility.
Popular styles include:
Cable wine racks create the illusion that bottles are suspended in mid-air, making them especially popular in luxury homes and glass wine rooms.
Once storage is complete, attention shifts to the finishing touches.
These design elements transform the cellar into a true showpiece.
Common finishing features include:
Frameless or framed insulated glass creates an elegant display while maintaining proper temperature control.
Options include:
The door should be insulated and sealed to prevent temperature loss.
Proper lighting highlights the collection without generating excessive heat.
Popular choices include:
Warm LED fixtures preserve labels while creating an inviting atmosphere.
Before filling the cellar with wine, every system should be thoroughly tested.
A final inspection typically includes:
The cooling system is often allowed to run for several days to confirm stable operating conditions before valuable bottles are introduced.
Once testing is complete, the cellar is ready to begin protecting your collection.
Construction timelines vary depending on project complexity.
Typical timeframes include:
| Project Type | Estimated Timeline |
|---|---|
| Wine cabinet installation | 1 day |
| Small closet wine cellar | 1–2 weeks |
| Custom residential wine cellar | 3–6 weeks |
| Large luxury wine room | 6–12 weeks |
| Commercial wine display | Varies by scope |
Custom cabinetry, specialty glass, and imported materials may extend the schedule.
Many wine cellar problems can be traced back to shortcuts taken during construction.
Avoid these common mistakes:
Working with experienced wine cellar professionals helps prevent these costly issues.
A custom wine cellar combines architecture, engineering, refrigeration, and interior design. Every decision—from insulation thickness to rack spacing and cooling system selection—affects long-term performance.
Professional planning offers several advantages:
A professionally built cellar is designed to perform reliably for years while showcasing your collection in the best possible way.
How long does it take to build a custom wine cellar?
Most residential wine cellars take 3 to 6 weeks to complete, although larger or more complex projects may require additional time.
Can any room become a wine cellar?
Many spaces can be converted into a wine cellar, including basements, closets, under-stair areas, spare rooms, and dining room alcoves. Proper insulation and climate control are essential.
What is the most important part of wine cellar construction?
The insulated cellar envelope and correctly sized cooling system are the foundation of a successful wine cellar. Without them, even the most beautiful racks cannot protect your collection.
Should I install the cooling system before the wine racks?
Yes. The cooling system and room preparation are typically completed before the wine racks are installed to ensure proper airflow and climate performance.
Can I expand my wine cellar later?
Yes. Many custom wine cellars are designed with future expansion in mind by leaving space for additional racks or choosing modular storage systems.
Is a permit required to build a wine cellar?
Permit requirements vary depending on your location and the scope of work. Projects involving electrical, plumbing, HVAC, or structural changes may require permits, so it’s best to check with your local building authority or contractor.
Building a custom wine cellar is a step-by-step process that blends thoughtful design with precise engineering. From evaluating the space and creating a climate-controlled environment to installing elegant wine racks and finishing details, each stage plays a critical role in protecting your collection and enhancing your home.
Whether you’re creating a compact wine room or a luxury glass-enclosed showcase, following these seven steps ensures your cellar isn’t just beautiful—it provides the stable conditions your wines need to age gracefully for years to come.