
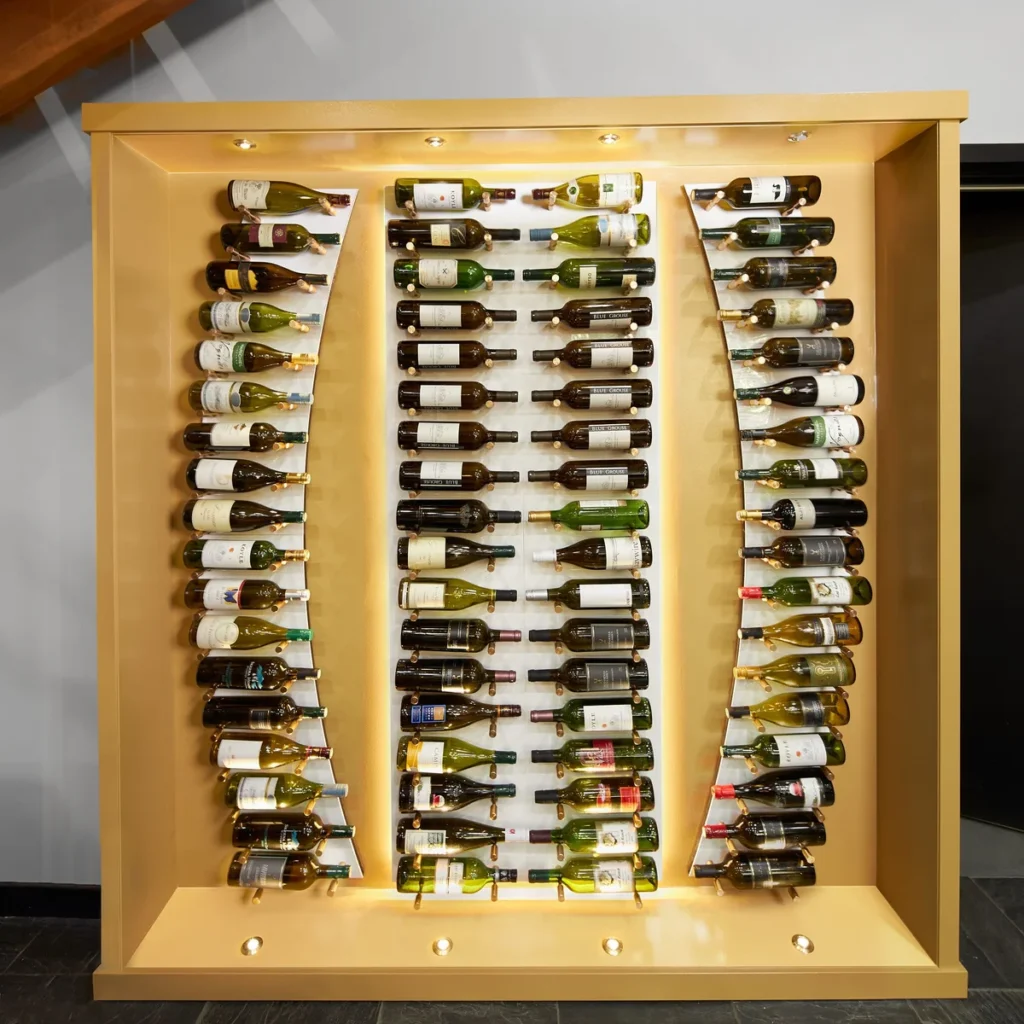
If you’re planning to entertain guests over the holidays, a wine wall can turn an ordinary dining room, kitchen, home bar, or entertainment space into a conversation piece.
The good news? You don’t necessarily need to build an entire custom wine cellar to get the look.
A VINdustry Wine Pegs & Panel Kit can create a modern wine display using a panel and strategically positioned wine pegs. The system is designed so homeowners can create their own bottle layout, making it an appealing weekend project for anyone looking to have a new wine display ready before the holiday entertaining season.
Cool Wine Cellar offers VINdustry configurations including 3-foot-tall rectangular panels and 6-foot-tall curved panels, giving homeowners a choice between a compact accent display and a more dramatic wine-wall installation.
VINdustry is a modern wine display system that uses pairs of wine pegs to support individual bottles.
Each pair is designed to display one standard 750 ml wine bottle. With additional spacing, the pegs can also accommodate a 1.5-liter Magnum bottle.
Instead of using conventional cubbies or horizontal shelves, the pegs allow the bottles to become part of the wall design.
You can arrange the pegs in rows, staggered patterns, geometric layouts, or other configurations depending on the look you want.
That flexibility is particularly useful for a DIY weekend project because the display doesn’t have to look like a standard wine rack.
For a holiday installation, the two straightforward options are the 3-foot-tall rectangular kit and the 6-foot-tall curved kit.
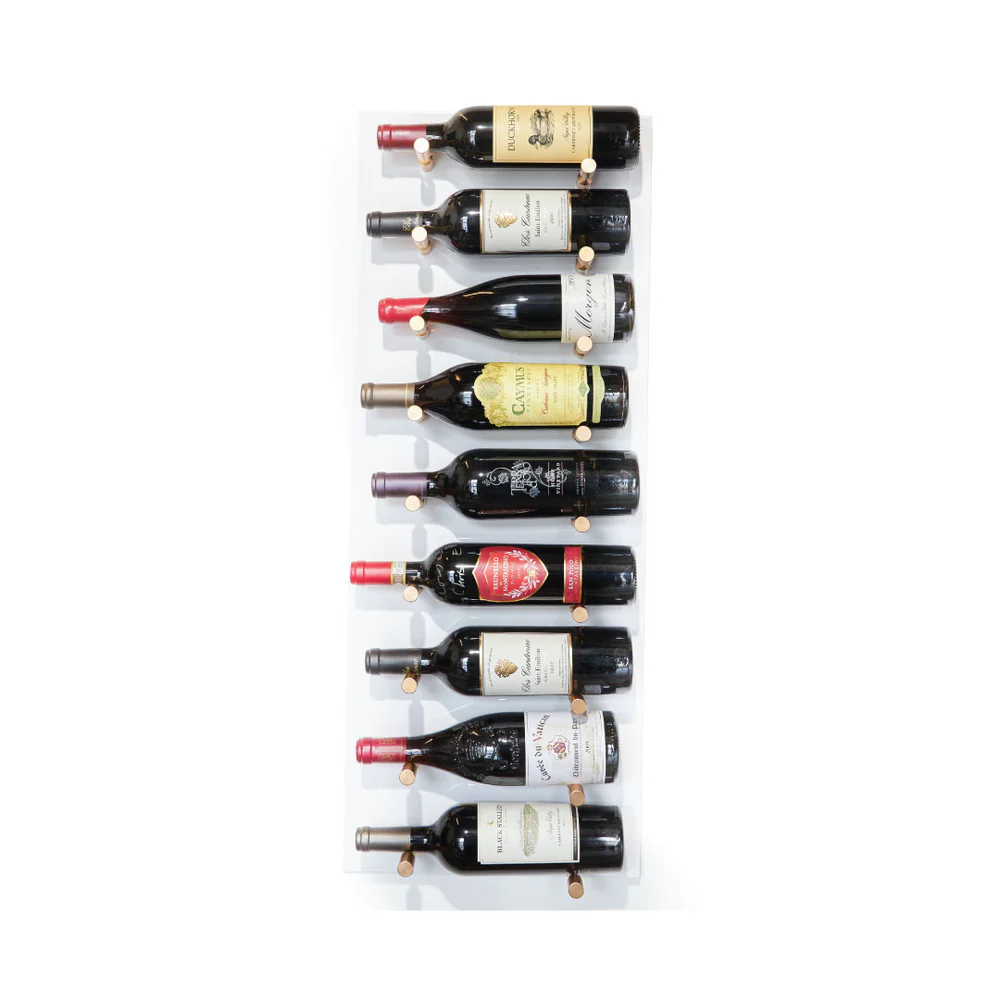
The 3-foot-tall rectangular kit is a good choice when you want a relatively compact wine display.
It can work well:
Behind a home bar
Above a countertop
In a dining room
In a kitchen
In a small entertaining area
As an accent wine wall
Cool Wine Cellar currently lists the 3-foot rectangular VINdustry Wine Pegs & Panel Kit in multiple configurations, with listed pricing of approximately $315–$428, depending on the selected options.
For a weekend project, this smaller footprint can be easier to integrate into an existing room without making the entire wall a construction project.
Want something that makes more of a statement?
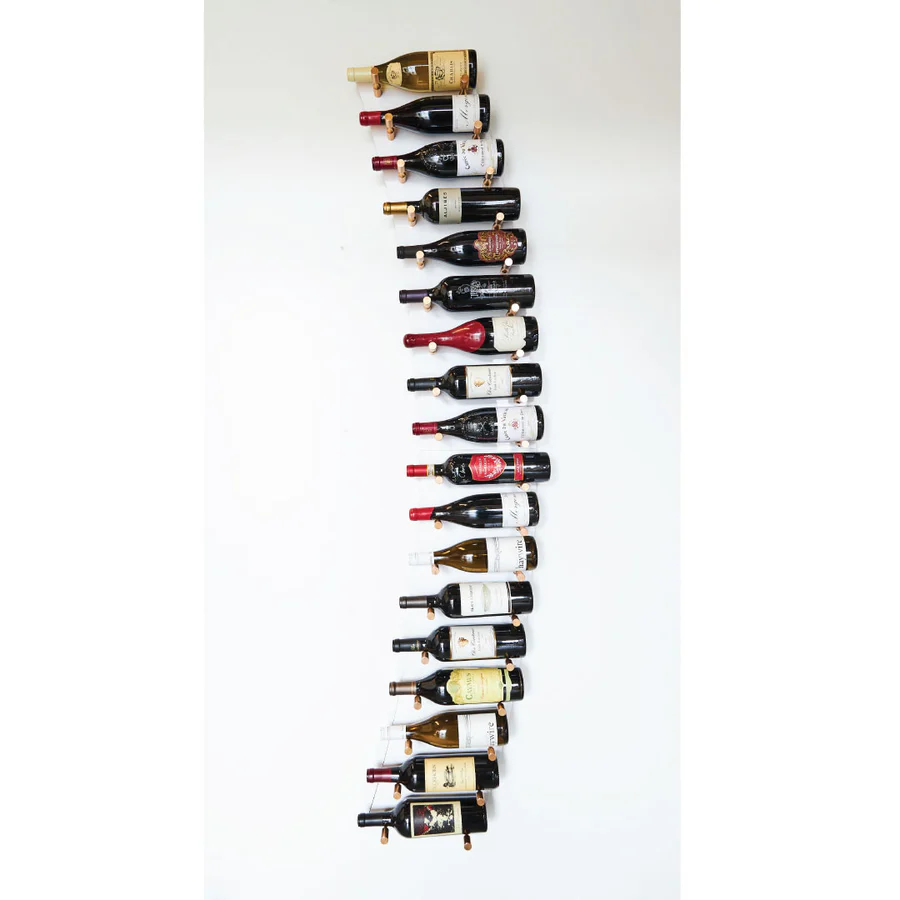
The 6-foot-tall curved VINdustry panel creates a larger vertical display and can become the focal point of a home bar, dining room, or entertainment space.
The curved profile gives the display a more sculptural appearance, while the larger height provides more opportunity to create a dramatic bottle arrangement.
Cool Wine Cellar currently lists the 6-foot-tall curved kit at approximately $551–$854, depending on the selected configuration.
For homeowners who want a wine wall that guests immediately notice when they walk into the room, the larger panel can make a stronger visual statement.
Before beginning, gather your tools and confirm that the wall and mounting surface are appropriate for the installation.
You’ll generally want:
VINdustry panel and wine pegs
Appropriate mounting hardware
3/4-inch plywood or high-density MDF
Measuring tape
Level
Pencil
Drill
Appropriate drill bits
Screwdriver or driver bit
Stud finder, where applicable
Appropriate wall anchors or structural fasteners
The manufacturer’s installation information recommends a minimum 3/4-inch panel, with plywood or high-density MDF recommended for stability.
Important: The mounting hardware and substrate need to be appropriate for the specific wall and installation. When mounting into existing construction, verify that the wall can safely support the finished display and bottles.
Start by deciding where the wine display will live.
For holiday entertaining, think about where guests naturally gather.
A wall near the dining table or home bar can make the wine collection part of the entertaining experience. A wall in a kitchen can provide convenient access while also becoming a decorative feature.
Before drilling anything, consider:
Wall width
Ceiling height
Countertop locations
Door and cabinet clearances
Electrical outlets
Lighting
Furniture placement
How guests will access the bottles
For a 3-foot panel, you may be creating an accent feature.
For a 6-foot panel, you’re creating something closer to a true wine wall.
This is one of the most important parts of the project.
VINdustry installation information specifies a 3/4-inch-thick panel, with plywood or high-density MDF recommended for stability.
If you’re building the panel yourself or preparing the wall backing, make sure the substrate is appropriately sized, securely mounted, and capable of supporting the wine display.
The goal is to create a solid foundation before installing the pegs.
Don’t treat the panel as a decorative piece only—the finished installation will carry the weight of the bottles.
This is where the project gets creative.
One of the advantages of VINdustry is that the wine pegs can be positioned in different locations to create unique wine-wall layouts.
Before drilling, mark your desired positions.
You could create:
A traditional grid
Straight rows and columns for a clean, organized appearance.
A staggered layout
Offset each row to create a more dynamic display.
A minimalist arrangement
Use fewer bottles with more open space between them.
A feature pattern
Arrange bottles around a central design element or decorative feature.
For the holidays, consider leaving some open space so the wine wall doesn’t look overcrowded when you add seasonal décor.
Once you’ve chosen your layout, carefully mark the mounting positions.
Measure twice before drilling.
The two pegs supporting each bottle need to be positioned appropriately for the bottle size and display orientation.
If you plan to display larger Magnum bottles, allow additional spacing as recommended for the larger bottle format.
A level is particularly useful here. Even a small measurement error can become obvious once several rows of bottles are installed.
VINdustry installation instructions describe several mounting approaches depending on the substrate.
For a 3/4-inch panel, standard bolts can be installed through the back side of the panel.
For direct attachment to wood or high-density MDF with a minimum 3/4-inch thickness, the listed guidance specifies 50 mm anchor bolts.
For plywood or MDF substrate thicker than 30 mm, the guidance specifies 70 mm anchor bolts.
Always match the fastener and installation method to your actual wall construction and follow the product’s current installation instructions.
If you’re unsure about the structure behind the wall, this is the point where bringing in a qualified installer can save you from having to redo the project later.
Once the mounting points are secure, install the wine pegs according to the system’s instructions.
Take your time during this stage.
The objective isn’t just to get the pegs onto the wall—it’s to make sure the entire arrangement is level, evenly spaced, and visually consistent.
Step back periodically and look at the wall from across the room.
A wine display is a design feature, so small adjustments at this stage can make a significant difference to the finished appearance.
Now comes the fun part.
Start placing bottles into the completed display.
For a holiday-ready look, you don’t have to fill every position.
Instead, consider creating a curated selection featuring:
Champagne and sparkling wine
Favorite reds
White wines for dinner
Special occasion bottles
Gift bottles
A few visually distinctive labels
Leaving some negative space can make the display look more intentional and upscale.
Lighting can completely change the appearance of a wine wall.
VINdustry’s product page also highlights custom LED panels as an option for modern wine displays, noting that they can be tailored to the design and used to illuminate the collection.
For a holiday entertaining space, consider warm, subtle lighting rather than extremely bright illumination.
The objective is to make the wine bottles glow as part of the room’s atmosphere.
You can also coordinate the display lighting with:
Under-cabinet lighting
Bar lighting
Pendant lights
Dining room fixtures
Other holiday lighting
| Feature | 3-Foot Rectangular | 6-Foot Curved |
|---|---|---|
| Overall effect | Compact accent display | Large statement wine wall |
| Best location | Bar, kitchen, dining area | Home bar, entertainment room, feature wall |
| Style | Clean and contemporary | Sculptural and dramatic |
| Installation footprint | Smaller | Larger |
| Ideal project | Weekend accent upgrade | Major focal-point installation |
| Listed price range* | Approx. $315–$428 | Approx. $551–$854 |
*Listed pricing can vary based on configuration and options.
Once the installation is complete, resist the temptation to cover the display with decorations.
The wine bottles should remain the star.
Instead, incorporate small seasonal touches around the wine wall.
Try:
Evergreen branches
A small wreath nearby
Warm white lights
Metallic holiday accents
Candles on an adjacent countertop
Seasonal glassware
A holiday centerpiece nearby
This allows the wine display to transition naturally from an everyday design feature into a holiday entertaining focal point.
One of the appealing things about a VINdustry panel kit is that it can deliver the look of a custom wine wall without requiring an entire room to be transformed.
The 3-foot rectangular kit is well suited to a compact accent display, while the 6-foot curved kit can create a much more dramatic feature.
Both rely on the same basic idea: a secure panel, carefully positioned mounting hardware, and wine pegs arranged to create a display that’s uniquely yours.
With the right preparation, a weekend can be enough to transform an empty wall into a wine display that’s ready for holiday entertaining.
If you’re planning a holiday gathering, now is a good time to think beyond the wine bottles themselves.
A thoughtfully designed wine wall gives guests something to look at, makes your collection easier to access, and adds a contemporary architectural element to your entertaining space.
Explore the VINdustry Wine Pegs & Panel Kits at Cool Wine Cellar and choose between compact 3-foot designs and larger 6-foot displays.
Explore VINdustry Wine Pegs & Panel Kits at Cool Wine Cellar
DIY tip: Before starting installation, review the current product instructions and verify the wall structure, substrate thickness, fasteners, and finished load capacity for your specific installation. When in doubt, consult a qualified professional.